If you’ve ever spent hours machining a precision part, only to find it warped, bent, or out of tolerance once it comes off the machine, you know how devastating that can be. As a precision machined parts supplier, I’ve seen this problem derail projects, blow budgets, and erode customer trust more times than I’d like to admit. Deformation during production isn’t just a minor hiccup—it’s a major barrier to delivering parts that meet the tight tolerances (often ±0.001 inch or less) industries like aerospace, medical devices, and defense demand. Over the past 12 years, I’ve learned that preventing this deformation isn’t about lucky guesses or strict rules alone; it’s about understanding the science behind why parts deform, then building consistent, practical processes to counter it. Let me walk you through what works for our team—and what will work for yours too. Precision Machined Parts

First, let’s get one thing straight: deformation rarely happens by accident. It’s almost always the result of three interconnected forces at play inside a part during machining: residual stress, thermal distortion, and mechanical clamping. Let’s break each down. Residual stress is the internal stress locked into a material during its initial manufacturing—for example, when a steel billet is rolled, or a titanium forging is pressed into shape. When you machine away a chunk of material from one side, you unbalance those internal stresses, and the part twists or bends to equalize itself. Thermal distortion comes from the heat generated by the cutting tool rubbing against the part. Even with cutting fluids, that heat softens the material slightly and causes it to expand during machining—then when it cools, it shrinks, often unevenly. Then there’s mechanical clamping: if you grip a part too tightly in a vise or collet, you squeeze it out of shape while it’s being machined, and once you release the clamp, it springs back into a deformed version. These forces don’t act in isolation, either—they stack up, and a small misstep in one area can turn a perfectly good billet into scrap.
The first line of defense against deformation starts before you ever turn on the machine: choosing and prepping your raw material correctly. I can’t tell you how many times a customer has sent us a “cheap” raw billet that looked uniform on the surface, but had hidden residual stress deep inside, leading to deformation mid-machining. For high-stakes precision parts, we only work with verified materials that undergo stress-relieving processes like annealing or cryogenic treatment before we even start. Annealing, for example, heats metal to a precise temperature, holds it there for hours, then cools it slowly to neutralize internal stresses—something we’ve found reduces post-machining deformation by up to 40% for alloy steels. We also always confirm the material’s consistency with a hardness test before machining; if a billet has a hardness variation of more than 2 HRC across its length, that’s a red flag we don’t ignore. Another trick we use: for parts that will undergo heavy material removal (say, cutting 30% of a billet away), we do a rough stress-relief anneal after the first roughing pass, not just once before machining. That lets us release the initial residual stress, then stabilize the part before moving to finishing cuts.
Next, clamping might seem like the simplest step, but it’s actually one of the most common causes of preventable deformation. Years ago, we made a mistake with a batch of small medical tool parts: we clamped them in a standard vise with too much force, and 12 out of 50 parts came out bent. We fixed that by revisiting our clamping strategy entirely. First, we use the lightest possible clamp force that keeps the part secure during cuts. For delicate parts, we even use custom soft jaws that match the part’s exact contour, so the pressure is distributed evenly instead of being concentrated at a few points. We also avoid clamping near areas that will be machined later; if a part has a thin wall or a small feature that will be cut away, we clamp to the solid, thicker sections only. For parts that need to be machined on multiple sides, we use sequential clamping: machine one side, release the clamp slightly, then re-clamp for the next side to let the part settle back into its natural shape. Another game-changer for us is vacuum clamping for flat, thin parts. A vacuum chuck pulls the part flat across its entire surface, so there’s no point pressure, and we’ve cut post-clamping deformation to nearly zero for 0.5-inch thick aluminum plates. We also check every clamp setup with a dial indicator before starting the final cut—even a tiny 0.002-inch bend in the clamped part will become a 0.010-inch deformation once the clamp is released.
Then there’s thermal distortion, which is often overlooked because it’s temporary during machining. The heat from a cutting tool can raise the temperature of a part by 100°F or more in a matter of minutes, and if that heat isn’t controlled, it will warp the part as it cools. Our first rule for managing heat is to use the right cutting tools and parameters. We use high-quality carbide tools with sharp edges—dull tools generate far more heat than sharp ones, and that extra heat is the #1 cause of thermal distortion in our shop. We also adjust spindle speed and feed rate based on the material: for titanium, we run at a slightly lower speed with a higher feed to reduce the time the tool is in contact with the part, which cuts down on heat buildup. Cutting fluid isn’t just a lubricant—it’s a heat sink. We use flood cutting fluid for most of our machining, and for parts with tight tolerances, we use through-tool coolant, which delivers fluid directly to the cutting edge where heat is generated. That keeps the part’s temperature stable throughout the entire process. We also let the part cool to room temperature before taking any final measurements. It’s tempting to check a part right after machining, when it’s still warm, because it might read within tolerance—but by the time it cools, it will have shrunk enough to be out of spec. We build in a 15-minute cooling period after every finishing cut, and that small step has saved us thousands of dollars in scrap.
Once we get to the machining process itself, how we remove material makes a huge difference. Roughing cuts that take off large chunks of material at once are necessary for speed, but they also create big changes in the part’s stress balance. We no longer use deep, aggressive roughing cuts for high-precision parts. Instead, we use lighter, more gradual roughing passes that remove material evenly from all sides of the part. That way, we don’t create one side of the part that’s missing most of its material, leading to an imbalance in stress. For example, if we’re machining a rectangular block into a cylindrical part, we machine 1/8 inch from all four sides before moving to the final diameter cut, instead of machining half the diameter in one go. We also leave a small “skin” of material (usually 0.010 to 0.020 inches) on the part after roughing, and then do a second stress-relief anneal before finishing. That skin acts as a buffer, keeping the part stable during roughing, and when we finish it, we only take off a small amount, so we don’t introduce new residual stress. We also use constant machining paths that don’t switch directions abruptly. Abrupt direction changes can cause the tool to rub unevenly, leading to localized hot spots and distortion. By programming smooth, consistent tool paths, we’ve reduced variable thermal distortion by about 25% in our shop.
Another step we’ve incorporated is post-machining stabilization, which is often the last line of defense, but critical for parts that will see stress in service too. Even after all our precautions, some parts will have tiny residual stresses that become apparent after finishing. We use methods like vibration stress relief (VSR) for most metal parts, which uses a vibration device to send controlled frequencies through the part, releasing small internal stresses without the high heat of thermal annealing. For more demanding aerospace parts, we use cryogenic treatment: cooling the part to -300°F over 24 hours, holding it for another 24 hours, then warming it slowly. This not only releases residual stress, but also improves the material’s strength, which is an added bonus for our customers. For plastic machined parts, we do a post-machining humidity soak, since plastic absorbs moisture and can expand or shrink if it’s not stabilized before final measurement. This is extra important for parts that will be used in environments with fluctuating humidity, but even for indoor applications, it prevents last-minute deformation.
We also can’t forget the role of measurement and inspection in preventing deformation. If you’re not checking parts at multiple stages of production, you won’t catch deformation until it’s too late. We use coordinate measuring machines (CMMs) at three key points: after roughing, after stress relief, and after finishing. The CMM can detect even 0.001 inch of deformation that a manual caliper or micrometer would miss, and that lets us adjust our processes before we waste time on finishing. We also use in-process probing on our CNC machines, which checks the part’s dimensions right after each roughing pass. If the part is bending, the probe will pick it up immediately, and we can adjust the clamp or the next cut before it becomes a bigger problem. One mistake we made early on was relying only on final inspection; now, we consider in-process checks non-negotiable, and that has cut our scrap rate for precision parts by more than half.
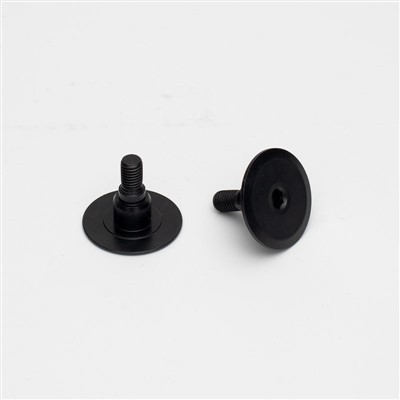
At the end of the day, preventing deformation is all about consistency. Every part we machine follows the same core sequence: verified stress-relieved material, optimized clamping, heat control, gradual material removal, and multi-stage inspection. We tailor these steps to each specific part and material—for example, a 1-inch aluminum part is machined differently than a 6-inch titanium part—but the underlying principles stay the same. For our customers, this means parts that come out of the machine exactly as designed, no unexpected twists, bends, or out-of-tolerance measurements. If you’re dealing with precision parts that are failing due to deformation, or if you want to avoid that headache from the start, we’re here to help. We work with industries from medical devices to aerospace, and we’ve honed these processes over thousands of jobs to deliver consistent, high-quality parts on time. Whether you’re new to precision machining or looking for a supplier that gets the details right, we’d love to walk through your project with you and show you how we prevent deformation at every step.
Transmission Parts References
ASM International. (2019). Residual Stress in Machining. ASM Handbook, Volume 21: Composites.
Childs, T. H. C. (2006). Metal Machining: Theory and Applications. Butterworth-Heinemann.
DeVries, W. R. (2018). Analysis of Material Removal Processes. Springer.
Jorgensen, P. J. (2020). Thermal Distortion in Precision Machining. Journal of Manufacturing Processes.
Taizhou Liuhuan Machinery Co., Ltd.
As one of the most professional precision machined parts manufacturers and suppliers in China, we’re featured by quality products and good service. Please rest assured to buy customized precision machined parts made in China here from our factory. For quotation, contact us now.
Address: Xinyuan Industrial Zone, Damaiyu Street, Yuhuan City, Zhejiang Province,China
E-mail: tzlhmachining@gmail.com
WebSite: https://www.tzlhmachining.com/
